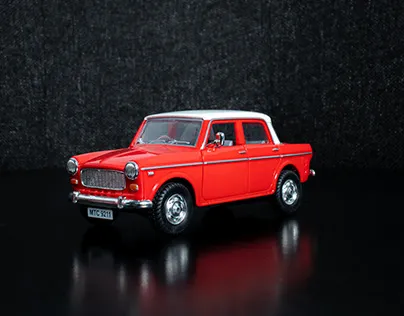
What is Repainting Diecast
Repainting diecast models is the process of stripping off the existing paint and applying a new finish. This hobby allows enthusiasts to customize their models, repair damage, or restore vintage pieces to their former glory. It’s a rewarding project that combines artistry, precision, and a little bit of patience. Whether you’re a seasoned modeler or a complete beginner, repainting diecast cars can be a fun and creative way to express yourself and breathe new life into your collection. The appeal lies in the ability to transform a standard model into a unique, personalized piece, reflecting individual preferences and artistic vision.
Why Repaint Your Diecast Model
There are numerous reasons why someone might choose to repaint their diecast models. Perhaps the original paint job is damaged or faded, detracting from the model’s appearance. Maybe you want to change the color scheme to match a real-life vehicle or create a custom design. Repainting also offers an opportunity to improve the overall quality of the finish, using better paints and techniques than those used in mass production. For collectors, repainting can restore valuable vintage models, preserving their history and increasing their value. Finally, the act of repainting itself is a therapeutic and engaging hobby, providing a creative outlet and a sense of accomplishment as you transform a simple model into something extraordinary. This is a great way to improve your skills and learn something new.
Materials You’ll Need to Repaint Diecast

Before you begin, gather the necessary materials. This includes paint stripper or a suitable alternative, such as brake fluid or oven cleaner (use with caution), a variety of fine-grit sandpaper, primer, your chosen paints (acrylic or enamel are popular), clear coat for protection, masking tape, a hobby knife or X-Acto knife, paintbrushes or an airbrush, and various cleaning supplies. You’ll also need safety equipment, such as gloves, a respirator, and eye protection. The specific materials will depend on the complexity of your project and your desired finish. Ensure you have a well-ventilated workspace to minimize exposure to fumes. Having the right tools and supplies will make the process easier and improve the final result.
Preparing Your Diecast for Repainting
Preparation is key to a successful repaint. This starts with carefully disassembling the model. Remove all removable parts, such as wheels, windows, and interior components. Use a hobby knife to gently pry apart pieces that are glued or snapped together. Next, strip off the old paint. This can be done with paint stripper, following the manufacturer’s instructions, or carefully by hand sanding. After stripping, thoroughly clean the model to remove any residue. Then, sand the surface with progressively finer grits of sandpaper to smooth out imperfections. Finally, apply a primer coat to provide a good base for the new paint to adhere to. This process ensures a smooth, even finish and improves paint adhesion.
Step-by-Step Guide to Repainting Diecast
Disassembly and Cleaning

Carefully disassemble the diecast model, taking photos as you go to help with reassembly. Remove all detachable parts, such as wheels, windows, and interior components. Clean the model with soap and water to remove any dirt or grease. This prepares the model for the next stages of the repainting process.
Sanding and Priming
Once the paint is removed, sand the surface to smooth out any imperfections. Start with a coarser grit sandpaper and gradually move to finer grits. Apply a thin, even coat of primer to the prepared surface. Allow the primer to dry completely according to the manufacturer’s instructions. Priming provides a good base for the new paint and helps it adhere properly.
Painting Your Diecast
Choosing the Right Paint

Choose paints specifically designed for model painting. Acrylic and enamel paints are popular choices for repainting diecast models. Acrylics dry quickly and are easy to clean up with water, while enamels offer a durable, glossy finish. Consider the color and finish you desire. Research different paint brands and types to find what best suits your project. Always test the paint on a small, inconspicuous area first to ensure compatibility with the primer and the model’s material.
Applying the Paint
Apply the paint in thin, even coats, allowing each coat to dry completely before applying the next. Using an airbrush can provide a smoother finish, but paintbrushes can also be used for smaller details. Avoid applying too much paint at once, as this can lead to drips or runs. Multiple thin coats will always give you a better result. Follow the paint manufacturer’s instructions for drying times and application techniques.
Detailing and Finishing Touches
Once the paint is dry, add details such as stripes, logos, or custom graphics using fine-tipped brushes, decals, or stencils. Once all the details are applied and dry, apply a clear coat to protect the paint and add a glossy finish. This clear coat also protects the paint from UV damage and scratches, ensuring your work will last.
Reassembly

Carefully reassemble the diecast model, referring to the photos you took during disassembly. Ensure all parts fit securely and that nothing is damaged during the reassembly process. This final step brings your repainted model back to life, ready to be displayed or added to your collection.
Protecting Your Repainted Diecast
To protect your repainted diecast model, display it away from direct sunlight and extreme temperatures, which can cause the paint to fade or crack. Consider using a display case to protect it from dust and accidental damage. Handle your model with clean hands to avoid leaving fingerprints. Regular cleaning with a soft cloth will help maintain its appearance for years to come. Proper care will ensure your custom paint job remains vibrant and beautiful.